Sunday, April 14, 2013

12 hour days

It is quite amazing what can happen when you work from 8:30 in the morning to 8:30 at night. Here is a synopsis in photographs (you can go to the Photos page for captions on all the photos).


The next steps are:
 finish the wiring, put siding up, put paneling on the interior loft walls... and more!

Till later,

Celina

Sunday, March 24, 2013

Under Pressure

Test tiles in painted steel (just to make sure they work)!
Hand bending every tile (each tile took 8 bends), a total of 200 tiles.
Working in a sheet metal shop for four days was a wonderful experience!
Building my eaves!
My sissy joined us for a day of prep, getting ready to put Ice and Water barrier on!
My roof is blue with Ice and Water barrier! Now I can sleep at night when it rains. : )
My daddy and I ready to put the (custom made by us) flashing up!


I learned something about myself. I work really well under pressure. When there is a deadline, I get things done and I do them well.

So... I made myself deadlines for everything I have to do to get this project done. I will share the timeline later. But by the end of this month (March) I will:

Finish the roof (totally)
Have an extensive Plumbing and Electrical plan (and maybe even get it wired)
Start building (or get) both of my doors (front door, and bathroom door)
Acquire/make my all of my windows

Many many thanks to Nick at Pacific Sheet Metal and Roofing, for walking me through building a custom roof, and letting my dad and I have run of his shop for four days!

Back to work!

Celina


Sunday, February 3, 2013

A quick update:


My butcher block base and top are complete, the plan is to finish them with a mixture of (perhaps local) bees wax, linseed oil and turpentine.

My bathroom floor is complete! It is made of thin strips of Wenge laminated on to fir, and cut in to various sized strips. As far as I know, it will be finished with a product like WaterLox, which is a hard resin finish. Perfect for a bathroom floor.

I purchased a Fischer stove for $75. The original plan was to heat my little space with a tiny pot belly stove. But after much research and learning and talking, it turns out that is not the best option. I have two goals when it comes to heating my space. One is to use wood, because it is basically free to me. The other is to wake up in the morning, warm. If I were to use the little stove, and stock it up as much as possible. It would roast the small space, and only burn for a couple of hours. 

I got together with two brilliant guys, one is a horse logger, the other a cabinet maker. They came up with a great idea - build a small room outdoors that is very well insulated. Place the stove (the Fischer) inside and pack fire brick and water tanks around it. Connect the room to the house with an insulated pipe. Now stock up the fire and with a lever, control how much heat enters the house. And because of the size of the stove, it will still be toasty in the morning.

Also, I have begun to build my roof! Custom galvanized steel shingles. Pictures and  stories about that coming soon!

Back to the shop,

Celina


Tuesday, January 15, 2013

Fingers Crossed


We spent a ridiculous couple of weeks dealing with mold in the 40 degree weather with high humidity. To give you an image of what this looked like, we squeezed in next to the barn with two large ladders, me on one and my dad on the other. Then armed with spray bottles of vinegar and rolls of paper towels, we soaked the walls and wiped them down. Then we soaked them again. Next we dried the entire exterior of the house with a heat gun... then painted it with an exterior primer with a moldacide additive. And again, dried the entire thing with a heat gun. 

There was a moment when we (my dad and I) were up on ladders. I had the heat gun, he had the paint, there was music blasting in the background, we were reaching around each other trying to keep the area where the paint was to be applied warm, while drying the already painted spot. When we looked at each other and started to laugh.

We can't deny it any longer - we are insane!! And for now we are keeping our fingers crossed.

Off to the shop,

Celina


Wednesday, November 21, 2012

On Copper Roofs and Trusting Life


The past couple of weeks have been quite a challenge on the building forefront. What we are dealing with is my lack of knowledge and the excessive amounts of moisture in our current environment.

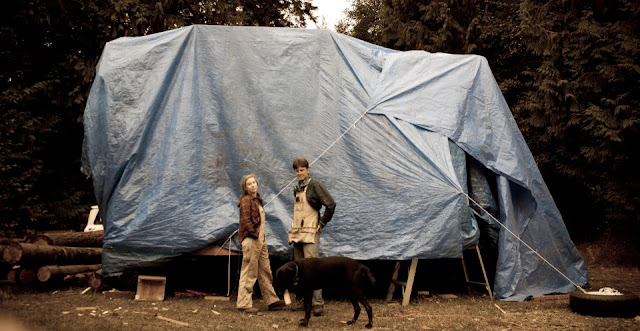
It all began with a bad decision. I wrapped the house in tarps to keep it dry. Well, as it turns out that wasn't the best choice when the weather got rainy. Instead it held the moisture inside, which you would think would be obvious to see. But it is one of those situations where when you are “in it” it is challenging to step back and realize what is actually going on.

So I made a mistake. The walls got very moldy inside and out, and now I get to deal with it. Though there seems to be a problem with the specific plywood that was used…

The first attempt we made to rid the environment of mold, was to spray and wipe the walls with 100% bleach (with vapor respirators of course), which was disgusting. Then move the trailer (house) to another location, where it can stay out of the rain with air movement on all sides. These actions made me feel much, much better.

But the mold was back in less than a week.... worse than before - a white fuzz coating the body of the trailer. This sent me towards despair! I am putting all my energy, love, hope and money in to this house and what do I get? Mold? I know I am getting much more than that, but sometimes it is hard to see.

I have learned something sense then. Bleach is not efficient at killing mold on porous surfaces. Because mold sends spores deep in the material and the ion structure of sodium hypochlorite (bleach) does not allow it to penetrate porous surfaces. So when you put bleach on mold - which is on a porous surface, the bleach part of the solution sits on the surface and the water part soaks into the wood, actually encouraging the mold to grow.

Instead we will use vinegar which seeps in to porous materials and kills 82% of molds. So keep your fingers crossed we are dealing with the "right" mold!

Plan #2. Seal the windows and doors, dry the trailer out using a dehumidifier, a heater and a fan. Spray the dry interior with vinegar and wipe it down. Dry the house again. Paint the interior with Kilz primer with a mold-icide additive. Then do the same process on the exterior using a heat gun and working in patches.

I have been realizing recently that rest is important. So today while waiting for the trailer to dry out we decided to head to Seattle and gallivant around architectural salvage warehouses! But we took the wrong exit off the freeway and got a bit lost. My dad saw a sign for a sheet metal and roofing company. And being who he is, he decides we are going in.

Long story short, we meet a really nice guy named Nick who has been in the sheet metal business for thirty years and really likes our projects. He offered to help me build whatever kind of roof I would like... for the cost of materials! He encouraged me to stick with my ultimate goal of using copper – but this might have to change since copper is very expensive right now. My mind is spinning with ideas!

Here's to wrong turns and trusting life!

Cheers,

Celina


Sunday, November 4, 2012

Mock-up and Mold

Click on each photo for descriptions


We mocked up all the furniture in my house, and spent a few days rearranging things until they felt just right. Next we made cardboard windows and determined size and placement! Everything is so exciting.... until I discovered a black and white fuzzy mold coating the majority of the walls. Inside and out. It turns out I didn't have enough ventilation, and with the moisture around here it created the perfect environment for mold to thrive.

So, I made a trip the hardware store today, coming away with respirators, neoprene gloves, spray bottles and bleach. The surprises never end, and we've got our work cut out for us!

Off to work,

Celina

Tuesday, October 23, 2012

Raising the Roof.... finally!


And there you have it! By tomorrow the roof will be totally sealed in : D now I get to go on the search for roofing!

Off to work,

Celina

Monday, October 8, 2012

Before Roof


An update on the progress.

We have been scrambling, preparing the structure for the roof and we are almost there! The roof better be up in the next couple of weeks... other wise I am screwed. 


Bathroom walls are up! I am obviously very excited : )

A note on the bright side of design - I love designing. I love imagining spaces that are alive and filled with beauty. Lately I have been having trouble getting to sleep at night, my mind is rolling on kitchen layouts and sliding doors, wall textures and window frames. It is so exciting to design a space that will be my home for the next many years!

Life is good,

Celina